Archive for 2013
Nails
One of the nail polishes I received for Christmas was Warhol pink. The rest I received in my Beauty Box from Vegan Cuts. I love them all because they're vegan. I've proceeded to mess up my nails since then due to some DIY gifts that I cannot wait to show once they are opened by their recipients.
Anthropologie love
Oh my goodness, you guys! Just when I thought I couldn't love Anthropologie anymore, I can. They've been hosting this #wantwishanthro giveaway on Instagram. Look at all these cute cute things they have been having sales on and giving away this month. The cub measuring cups tipped the scales in cuteness today and I just had to share this all with you.
Please note that I am not compensated in anyway by posting about this giveaway and sale. I just wanted to share my love of it to all of you.
Christmas time is here
The other night, I drove down the street and purchased this cute tree. The tablescape still needs work but overall I am happy with how this area looks. I actually have enough ornaments to lightly cover the whole tree now. (If you remember a couple years ago, I only had enough to cover the front of the tree. ) so far, Tater has left the tree alone which has been par for the course each year I've had her.
DIY post swap: knitted pillow
I am so happy to collaborate with Julie from Restless Hearts Yonder on a couple DIY posts. Julie and I have admired each other's crafts from time to time. I remember being especially blown away by them last year as she made Christmas gifts for people. She admired mine too and this year we decided that we would collaborate on DIY gifts. I wrote a DIY on her blog for a hand-stamped scarf and she wrote one for a knitted pillow (below). Keep reading to learn how to make your own knitted pillow.
So one of the things I know a lot of us do around the holidays is look for inspiration. I will spend a considerable amount of time on pinterest throughout the year, looking for "diy" project ideas. This year, I've take some of those ideas and turned them into actual projects that I will be giving as gifts. It's saving me money and getting me to be creative at the same time. This project was inspired by a lot of the knitted pillow covers I've seen out there. I knew I could make one for myself, because essentially all this is is a scarf folded over and sewn up the sides. I bought a nice chunky yarn in an oatmeal color and really love how this turned out. Give it a shot...I know you'll love this too!
There are two parts to this project: knitting and sewing. For the knitting portion, you can use whatever pattern you like...I, for one, am not a super experienced knitter so the ribs were complex enough for me. If you look closely, you will see that I messed up more than one time (talking and knitting at the same time!) but it's not noticeable enough for me to want to rip it all out and start over! You can use all purl stitches, you can use all knit stitches. If you know how to cable stitch, be my guest (I have not mastered that one yet). My thinking was that I wanted this pillow to be simple, but I wanted the texture to have some visual interest (hence the ribs). The sky is the limit, think of whatever you'd like! You could also do a pattern including other colors or a design of your own!
Here's what you'll need:
-knitting needles (I used a size 10, but probably could have used bigger ones)
-yarn of your choice (I used this kind)
-cotton fabric big enough to make a pillow insert out of
-polyfill or your choice of pillow filling
-a sewing machine or needle and thread
--a tapestry or plastic yarn needle with a large eye
For the knitting:
Cast on 40 stitches and straight stitch one row. From then on this will be your pattern: knit 5 stitches, purl 5 stitches. This will create the ribbing pattern. Stitch this for as long as you'd like (I had a specific size pillow in mind when I started), just remember that your piece will be folded over length wise to create the pillow cover so make it pretty long. In the end, mine measured 29 inches long.
After you're done knitting you will cast off and end up with a scarf looking piece. Set it aside and grab your fabric for the pillow insert. I made a pillow insert because putting batting into something that was knitted sounded like a mess. Take your knitted piece and stretch it as far across as it will stretch and measure it. Then measure the length. Take those measurements and make a square with your fabric, just as you would for a pillow. Sew around all the sides leaving a small hole to fill it with batting.
After you've filled your pillow, sew it shut. Then take your knitted piece and pin up one side. Put the pillow into the knitted piece--it's going to be really fluffy and might seem like your knitted piece won't be able to fit around it, but it will! Pin the pillow around all sides so that the pillow fits inside.
Thread a large eyed needle with a long piece of yarn. You're going to sew up the sides with a simple running stitch. Leave a tail at the end of your first stitch and tuck it underneath your stitches. Do this around the edge of your pillow. I found it easiest to do this while standing so that I could get the proper amount of tautness around the edge. Make sure that if you do the ribbing, your ribs match up when you're doing this--it's just like matching stripes or plaids!
When you're done just tie a simple knot and tuck the rest of the yarn inside the pillow. There you have it!!
I hope you enjoy making a pillow for someone this holiday season! I'm still debating whether or not I should give this as a gift or keep it for myself!! Happy crafting!!
find me here, here and here
gift ideas
While I have been looking at items for various swaps that I am participating in this year, I have run across a few items that I wouldn't mind having myself. I thought I would share some items with you all incase they inspire you for gifting others in this advent season.
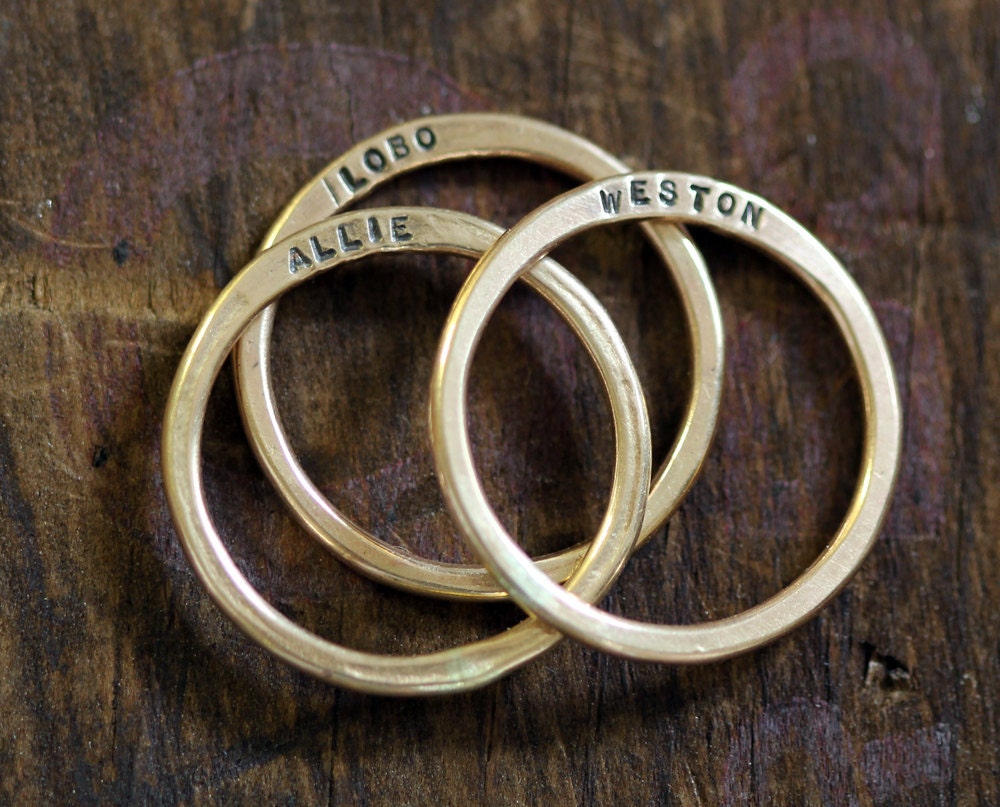
First up is this ring. Now, I am not really much of a jewelry girl. If I walk out the door with some jewelry on, it's usually for a special occasion or because the mood struck me just right. However, I like these rings in that they can be personalized. One with my name, or love or some other special word would just be fantastic. Plus, most of the rings that I find online are not available in my size thanks to my large, 9.5 size ring finger. This simple ring is--yay! Available at Monkeys Always Look on Etsy.
Those are the ones that I wanted to share for now. Have you run across anything really great that you're tempted to keep for yourself this season?
First up is this ring. Now, I am not really much of a jewelry girl. If I walk out the door with some jewelry on, it's usually for a special occasion or because the mood struck me just right. However, I like these rings in that they can be personalized. One with my name, or love or some other special word would just be fantastic. Plus, most of the rings that I find online are not available in my size thanks to my large, 9.5 size ring finger. This simple ring is--yay! Available at Monkeys Always Look on Etsy.
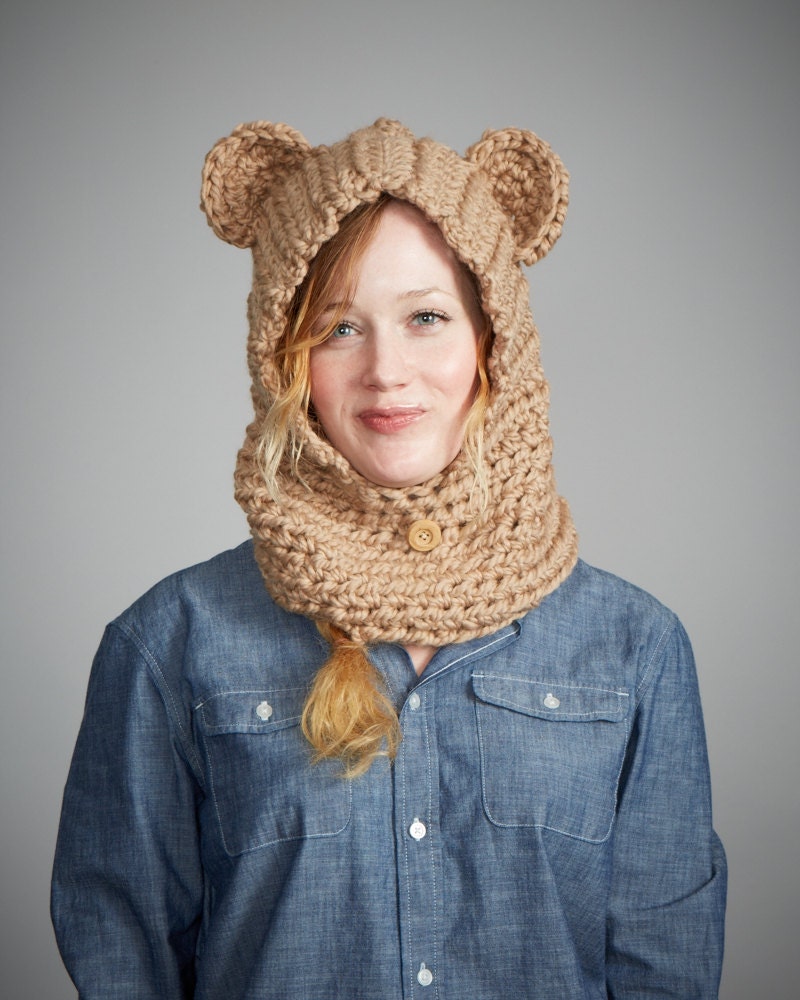
Then there's this cute little hat! I'm a sucker for things with ears on them and this is great. Hehe. I think I'd like it in a color other than beige-brown, but it is otherwise adorable. Available at The Seam Designs at Etsy.
Found this new, vegan nail polish brand, rainbow honey. I found them through my subscription to the Beauty Box at Vegan Cuts (also a great gift idea, folks!) and immediately loved them. I would love any of their nail polish colors, honestly. They are free of the Big 3: formaldehyde, toluene and dibutyl phthalate and not tested on animals. Perfect!
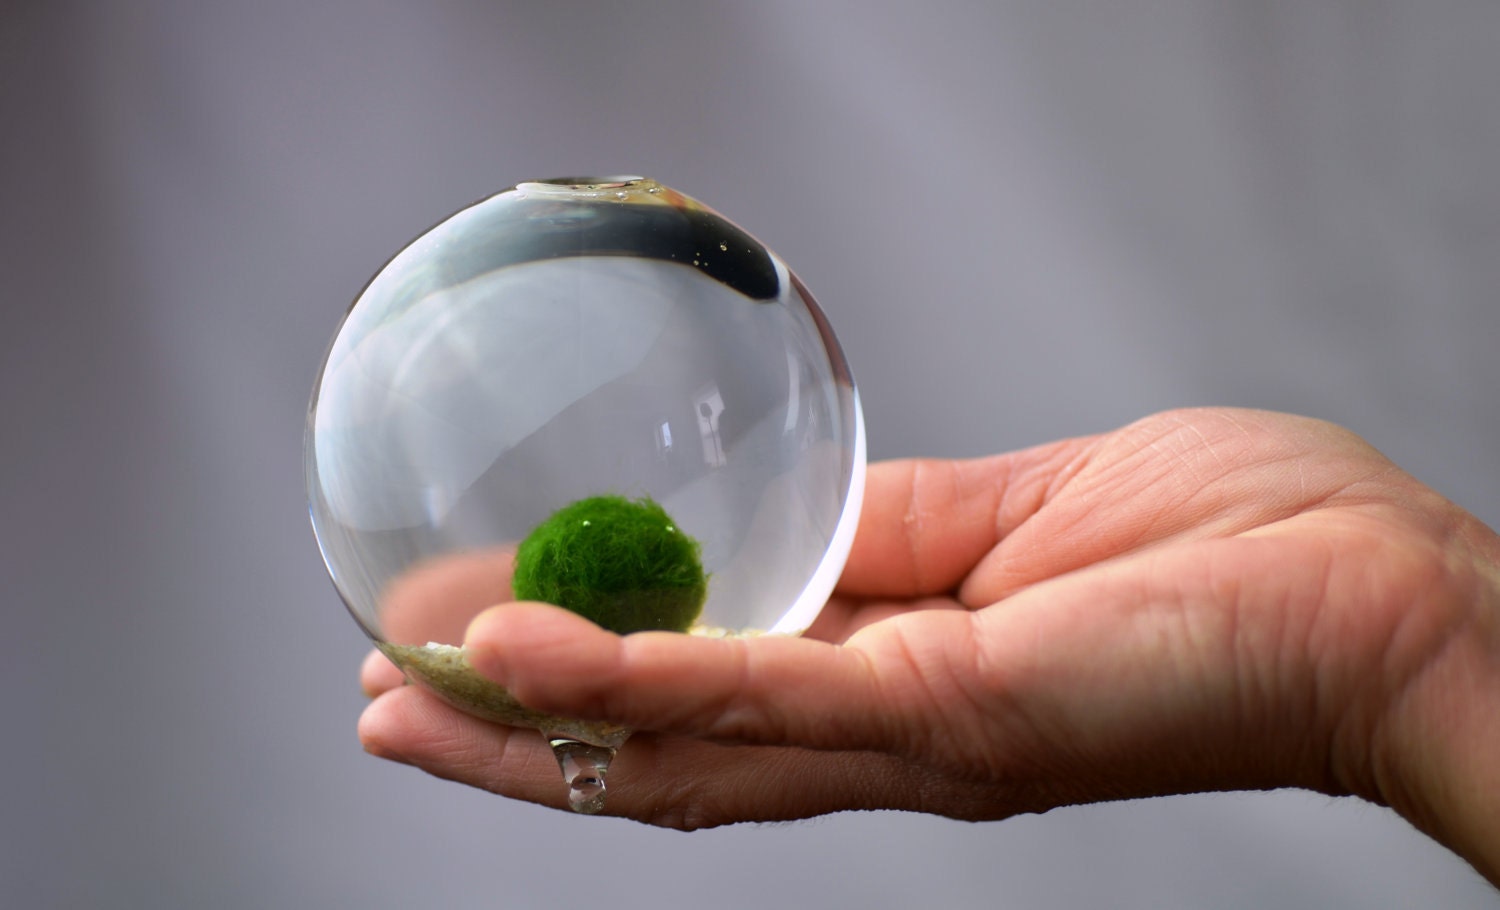
Marimo! I have been fascinated by these things since I first saw them. I love unique containers and plants and this combines them into one fascinating sea plant! They survive on tap water and since they actually live in water, I cannot kill it by watering it too much (believe me, I've done this)! A few shops sell them on Etsy, but I found this one at PinkSerissa.
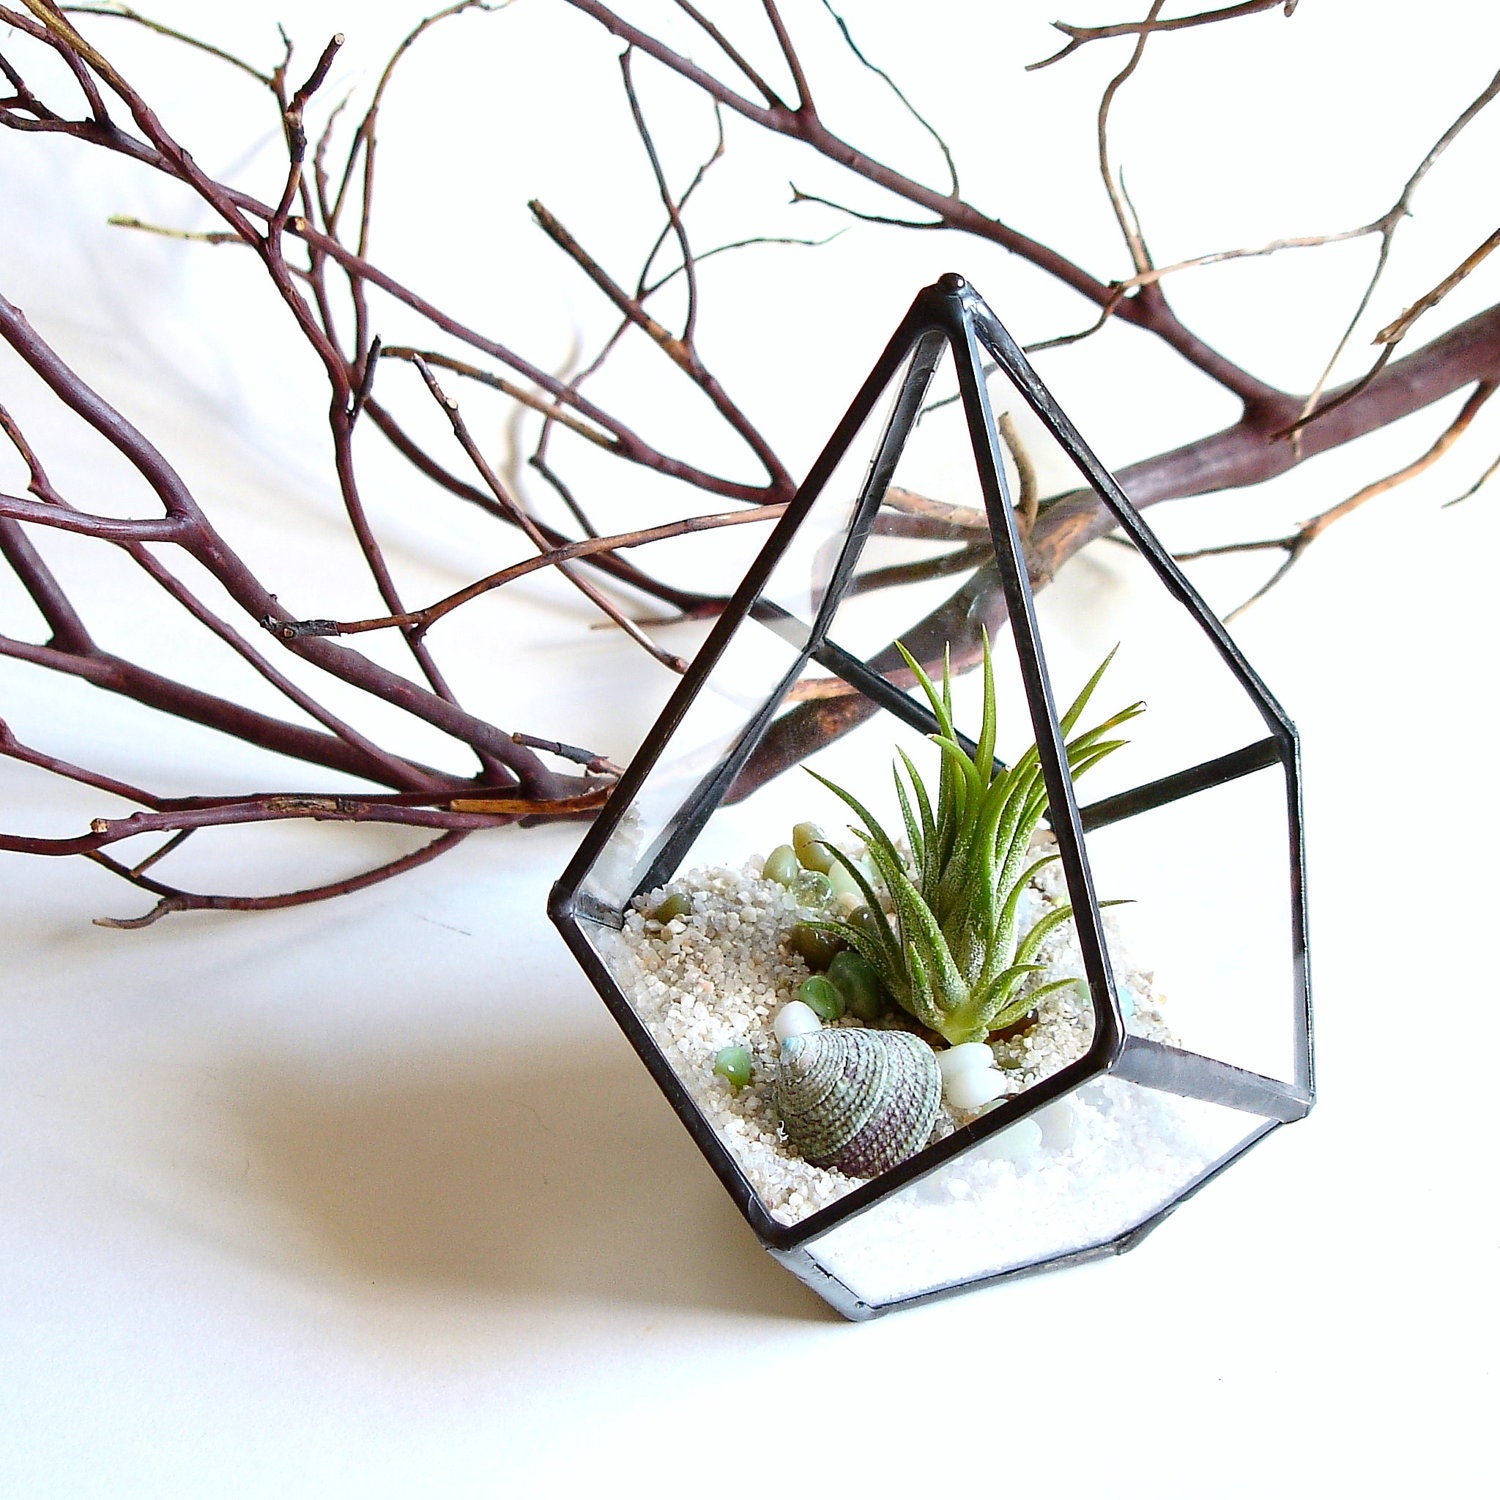
Glass terrariums! I love the clean lines and geometric shape of this particular terrarium. As someone who is pretty adept at killing houseplants, I like air plants because they're typically pretty hard to kill (unless left in the cold). This terrarium is available at Jechory Glass Designs on Etsy.
Those are the ones that I wanted to share for now. Have you run across anything really great that you're tempted to keep for yourself this season?
Black small biz Monday
Hi folks! This is a reminder that today is the last day to use the code SMALLBUSINESSSAT to save 20% off your your order. PLUS, I will create a mini state corkboard to be included in your order.
second annual ornament exchange
Hey folks! I would love to offer to organize the second annual ornament exchange. I hope that you can join us!
Since living on my own the past few years, I have been slowly amassing home decor items. One of the items I sorely lacked was during Christmas--ornaments. This was even more apparent to me two years ago when I only had enough ornaments to decorate the front half of the Christmas tree. I have a few more this year than I did last year but still not enough to fill a whole tree. I thought maybe there would be others like me out there who have been slowly growing their ornament collection. Hence, the Second Annual Ornament Exchange. (Bare with me while I use the graphics from last year…not much extra time equals no new graphics!)
Getting what you want:: The questionnaire includes a section for you to fill out to help your partner pick out or make an ornament that is sure to be something you'll like. So answer the questions thoroughly!
The sign-up:: If you wish to participate in this ornament exchange please fill out the questionnaire below. Please copy and paste the questions into a comment at the end this post or email them to me at jean (dot) emily (at) gmail (dot) com. Submitting the questionnaire is your commitment to follow the guidelines as they have been explained above.
::QUESTIONNAIRE::
Name:
Email Address:
Country in which you live: (as well as if you are willing to have an international partner or not)
Your interests in ornament type: (share some of your preferences to help your partner choose or make an ornament for you - i.e. colors, styles, specific item(s) you would like inside of the ornament, texture, a link or two to other ornaments you are interested in, etc.)
5 words to describe you or your style:
Link to your blog/shop if you have one:
Anything else you'd like to ask/share:
Help spread the word about the Second Annual Ornament Exchange by posting a button to your blog, sharing on Twitter/Facebook/Pinterest and any other social media site you use.
Best wishes and I cannot wait to see what we send each other!
Since living on my own the past few years, I have been slowly amassing home decor items. One of the items I sorely lacked was during Christmas--ornaments. This was even more apparent to me two years ago when I only had enough ornaments to decorate the front half of the Christmas tree. I have a few more this year than I did last year but still not enough to fill a whole tree. I thought maybe there would be others like me out there who have been slowly growing their ornament collection. Hence, the Second Annual Ornament Exchange. (Bare with me while I use the graphics from last year…not much extra time equals no new graphics!)
Partners:: I will pair each participant with one other person.
Cost:: It's free to participate but the ornament you send to your partner must have a minimum value of $5. If you go above and beyond the $5 worth, that is up to you and your partner. Also, if you make or sell ornaments and would like to send one of your own products to your partner that is fine AS LONG AS your product fits your partner's interests (more info about that below).
Shipping:: This gift exchange is open to international participants. I understand that some of you will be interested in items from other countries and some of you would prefer not to pay that much extra for shipping. Please be sure to specify in your comment below if you are willing to be paired with a person from a different country or not.
Schedule:: Sign-ups open today, Monday, November 25th. Sign-ups will close Monday, December 2nd. Partners will be announced Tuesday, December 3rd. Packages must be shipped no later than Tuesday, December 11th so we all have the ornament in time to admire on our tree.
Share + Admire:: If you'd like to share photos of the ornament/package you are sending or receiving feel free to post them on Instagram with the hash tag #ornamentexchange2013. Also, you can share them on your blog and either link back to this blog, comment below with the link, or email me about it. I look forward to sharing some exchanged ornaments when this has finished.
Getting what you want:: The questionnaire includes a section for you to fill out to help your partner pick out or make an ornament that is sure to be something you'll like. So answer the questions thoroughly!
The sign-up:: If you wish to participate in this ornament exchange please fill out the questionnaire below. Please copy and paste the questions into a comment at the end this post or email them to me at jean (dot) emily (at) gmail (dot) com. Submitting the questionnaire is your commitment to follow the guidelines as they have been explained above.
::QUESTIONNAIRE::
Name:
Email Address:
Country in which you live: (as well as if you are willing to have an international partner or not)
Your interests in ornament type: (share some of your preferences to help your partner choose or make an ornament for you - i.e. colors, styles, specific item(s) you would like inside of the ornament, texture, a link or two to other ornaments you are interested in, etc.)
5 words to describe you or your style:
Link to your blog/shop if you have one:
Anything else you'd like to ask/share:
Help spread the word about the Second Annual Ornament Exchange by posting a button to your blog, sharing on Twitter/Facebook/Pinterest and any other social media site you use.
DIY washi tape outlet
I don't have the best looking photos to share for this DIY, but I am too excited about it to snap some new ones right now. This is one of the easiest and the happiest of happiness-bringing (if that's a word) DIYs that I have done in a while and I wanted to share it with you all.
Before, this is what the outlet looked like. If you're a renter like me, you're stuck with a lot of these off-white or funny colored outlets. I was so tempted to replace them with white ones but I had two thoughts about that: 1. why should I pay the money if I'm just a renter and 2. the outlets themselves will still be that off-white color and I'm not sure my landlord would appreciate me painting them. However, I did not want to live with what I had, so what did I decide to do? Dress them up with washi tape, of course! If you're like me, you have rolls and rolls of this stuff hanging around, begging to be used.The supplies you need will include the wash tape of your choice (completely up to you what kind and how much you will use of each. This is what I had narrowed it down to.) and a flat-head screwdriver. Oh, and your faceplate too. Oh, and an exacto knife. I'll get better at this DIY thing…promise.
Once you unscrew the plate off the wall, you can start placing the tape. I started at the top and worked my way down. I liked having one different colored/patterned piece to start off and the rest was uniform. You can cut off the ends of the washi tape that are too long and/or you can tuck them around the back of the plate. Then with an exacto-knife, cut out the holes for the outlets and the screw hole.
Last, but not least, screw the
If you try this DIY, let me know how it turned out!


